There's a special kind of frustration reserved for cyclists plagued by mysterious bottom bracket noises. That rhythmic creak every pedal stroke, appearing exactly when you're grinding up a climb or trying to enjoy a peaceful morning ride, can transform cycling from meditative joy into an exercise in dental-floss patience. The noise often seems to come from nowhere—your bike was silent last week, and suddenly it sounds like a squeaky door in a horror movie. Even more maddening is the fact that bottom bracket creaks are notoriously difficult to diagnose. That clicking you're certain comes from your bottom bracket might actually originate from your pedals, cleats, seatpost, or even a loose water bottle cage bolt. For Australian cyclists who spend long hours in the saddle, sometimes far from help, understanding how to identify, diagnose, and eliminate these noises is essential knowledge. Let's explore the science of bottom bracket sounds and develop a systematic approach to restoring blissful silence.
Understanding Why Bottom Brackets Creak
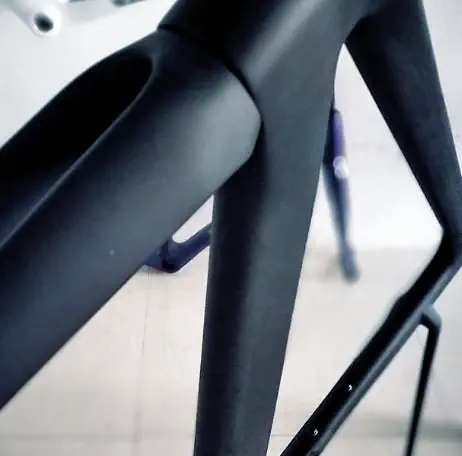
At its core, bottom bracket creaking results from movement between two surfaces that should remain stationary relative to each other. When pedalling forces cause tiny shifts between components, friction creates noise that resonates through the frame like an acoustic guitar body. Carbon frames are particularly effective at amplifying these sounds, which is why modern bikes often seem noisier than the steel and aluminium frames of decades past. Understanding this mechanism helps explain why the same bike can be silent for one rider and creak incessantly for another—subtle differences in pedalling style, terrain, and riding conditions all affect the forces applied to the bottom bracket interface.
Press-fit systems generate more creaks than threaded designs because they rely on precise frame machining to create interference fits between components. When manufacturing tolerances drift even slightly, gaps appear that allow microscopic movement under load. Carbon fibre frames also experience thermal expansion and contraction as temperatures change during rides, potentially creating or eliminating gaps as conditions shift. A bottom bracket installed at 10°C might fit differently at 30°C, particularly in Australia's extreme temperature ranges.
Threaded bottom brackets can also creak, though less frequently. When threads aren't properly greased during installation, or when frame threads are damaged or contaminated, the threaded interface can shift under load. Cross-threaded bottom brackets, over-tightened components, or frames that haven't been properly faced can all generate noise even in threaded systems. The difference is that threaded designs are more forgiving of minor installation errors and easier to correct when problems arise.
Beyond the bottom bracket itself, noises often originate from nearby components that transmit sound in ways that fool our ears. Pedal threads, cleat bolts, chainring bolts, crank arm interfaces, and even seat rails can all produce clicking that seems to emanate from the bottom bracket area. This phenomenon—acoustic misdirection—is why experienced mechanics recommend a systematic approach to noise diagnosis rather than immediately disassembling the bottom bracket.
Effective noise diagnosis follows a methodical process of elimination. Start by ruling out the simplest, most accessible causes before tearing into major components. This approach saves time and prevents introducing new problems through unnecessary disassembly. Begin with your shoes and cleats, which cause surprising numbers of mysterious clicks. Worn cleats that shift in pedal bindings create noise that travels up your shoe and into the frame. Remove your shoes and pedal in socks—if the noise disappears, you've found your culprit. Tighten or replace cleat bolts, apply a thin film of grease to the cleat-pedal interface, and verify that your cleats aren't worn beyond functional limits.
Next, check your pedals. Remove them, clean the threads thoroughly, apply fresh grease, and reinstall to proper torque specifications. Pedal threads are particularly prone to creaking because they experience significant stress from pedalling forces and are exposed to contamination from road spray and trail debris. If your pedals have serviceable bearings, inspect them for wear or contamination. Some pedal designs require periodic bearing service that's often overlooked until problems arise.
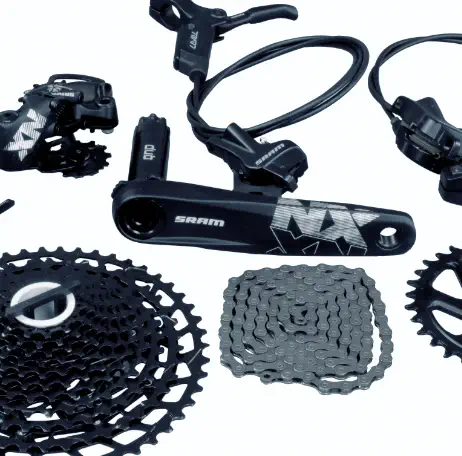
Chainring bolts represent another common source of clicking that mimics bottom bracket noise. These small bolts experience tremendous cyclical loading with every pedal stroke and can loosen over time, creating movement between chainring and crank spider. Remove each bolt, clean thoroughly, apply thread locker or grease as appropriate for your specific bolts, and reinstall to specification. Many mechanics recommend checking chainring bolts as routine maintenance every few months, especially for riders who regularly encounter rough surfaces.
The seatpost and saddle interface generates clicking that often masquerades as bottom bracket noise. Your body weight on the saddle creates forces that resonate through the frame, and any movement at the seatpost-clamp or saddle-rail interfaces can produce sounds that seem to come from below. Remove your seatpost, clean both the post and the inside of the seat tube, apply a thin layer of carbon paste or grease (depending on post material), and reinstall. Check saddle rail bolts and ensure your saddle isn't cracked or delaminating. A loose seatpost binder bolt can also create noise that seems to come from the bottom bracket.
Bottom Bracket Service: When Disassembly Is Necessary
If you've eliminated all other possibilities and the noise persists, it's time to address the bottom bracket itself. For threaded systems, removal is straightforward with a proper bottom bracket tool. Remove the crankset, then unthread the cups from the frame. Clean all threads thoroughly using a brush and appropriate solvent—contaminated threads are the most common cause of threaded bottom bracket creaking. Inspect the frame threads for damage, cross-threading, or corrosion that might prevent proper seating.
Before reinstallation, apply a generous amount of grease to both the frame threads and the bottom bracket cup threads. Use a waterproof or marine grease suitable for your riding conditions—standard bicycle grease works well for most applications, but riders in wet or coastal environments might prefer thicker, more water-resistant formulations. Thread the cups in carefully by hand for several turns before using the tool, ensuring you're not cross-threading the installation. Tighten to manufacturer specifications using a torque wrench if available.
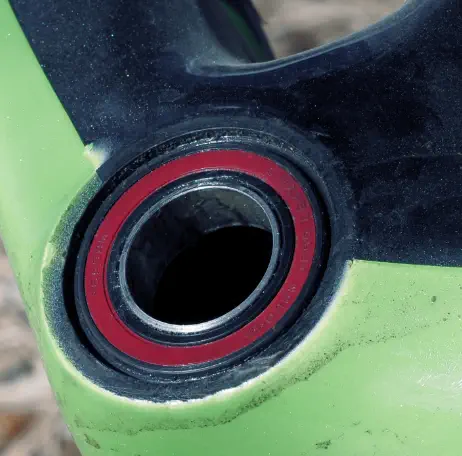
For press-fit bottom brackets, the process is more involved. Removing press-fit bearings requires either a bearing puller or a drift and mallet to gently tap the bearings out. Many riders find a headset remover tool works well for removing press-fit bottom bracket cups. Be careful not to damage the frame during removal—work slowly and evenly around the circumference rather than prying from one side.
Cleaning press-fit interfaces is critical for noise elimination. Use isopropyl alcohol or a similar solvent to clean both the frame bore and the bearing cups or cartridge surfaces. The interface must be free of all old grease, sealant, corrosion, and contamination before reinstallation. Some mechanics recommend using a very fine abrasive pad to lightly scuff both surfaces, creating better adhesion for the installation compound.
Apply a suitable press-fit-specific grease or retaining compound to both surfaces. Products like Park Tool's Press Fit Grease or similar formulations from other manufacturers are designed specifically for these applications. Some mechanics prefer retaining compounds like Loctite 641 for problematic frames, though these semi-permanent solutions make future service more difficult. Follow the product instructions carefully and ensure the compound is fresh—dried or expired products lose effectiveness.
Press the bearings in using a proper bearing press rather than improvised methods. The press ensures even, parallel installation without side-loading the bearings. Work slowly and stop frequently to check that the cups are entering the frame bore evenly. If resistance increases dramatically, stop and investigate—forcing a misaligned cup can damage the frame bore and create permanent fit problems. Once seated, allow any retaining compound to cure fully before riding, typically 24 hours for most formulations.
The Thread-Together Solution
For riders with persistent press-fit problems, thread-together bottom brackets offer an elegant solution. These innovative units, available from manufacturers like Wheels Manufacturing, Praxis, and others, thread together inside your frame rather than relying on press-fit retention alone. The drive side cup presses into the frame normally, while the non-drive side features large-diameter threads that engage with the drive side. Installing the non-drive side with a large wrench pulls the two cups together, creating a solid mechanical connection that resists creaking.
Thread-together bottom brackets have proven remarkably effective at eliminating noise in problematic frames. By creating a solid mechanical connection between the two sides, they eliminate the independent movement that causes creaking in standard press-fit systems. They're also easier to service than traditional press-fit designs—the non-drive side unthreads for bearing access without requiring a press for removal and reinstallation.
The primary limitation is compatibility. Thread-together bottom brackets require specific shell widths and are available for common press-fit standards like PF86, PF92, PF30, and BB30. They also cost more than standard press-fit units, though the price premium is modest compared to the frustration of persistent creaking. For Australian riders who've struggled with noisy press-fit bottom brackets, these units often provide the cure that countless other solutions have failed to deliver.
Prevention: Maintaining Silent Operation
Preventing bottom bracket noise is considerably easier than eliminating it once established. Establish a regular service interval based on your riding conditions. Riders in wet environments, those who frequently encounter dust or sand, and those who regularly wash their bikes should service bottom brackets more frequently than fair-weather riders. A general guideline suggests annual service for most conditions, but this should be adjusted based on your specific circumstances.
When installing or reinstalling bottom brackets, take time to do it correctly. Clean all surfaces thoroughly. Apply appropriate compounds—grease for threaded interfaces, press-fit-specific products for press-fit applications. Use proper tools and torque specifications. The few extra minutes spent on careful installation prevent hours of frustration chasing mysterious noises.
Pay attention to early warning signs. A bottom bracket that's beginning to feel rough, slightly notchy, or has developed the faintest hint of play needs service before it becomes a major problem. Ignoring these early symptoms allows minor issues to develop into significant damage that's more expensive and time-consuming to resolve. Regular inspection, ideally during other maintenance tasks, catches problems before they strand you on a ride.
Consider your riding conditions and adjust your maintenance accordingly. Australian riders face unique challenges from dust, heat, and in coastal areas, salt air. These conditions accelerate bearing wear and can contaminate bottom brackets faster than riders in milder climates expect. If you've recently ridden through water crossings, heavy rain, or particularly dusty conditions, consider your bottom bracket inspected or serviced as a precaution.
When Professional Help Makes Sense
While many cyclists can successfully service their own bottom brackets, professional service offers advantages that sometimes justify the investment. Pedal Passion's bottom bracket service includes crank safety checks and detailed bearing cleaning and regreasing. The accessible price point makes professional service practical for many riders who prefer expert attention over DIY maintenance.
Professional mechanics bring experience that allows them to diagnose problems quickly and identify subtle issues that might escape less experienced observers. They have access to all the proper tools and a range of replacement parts and upgrade options. For riders with expensive or complex bikes, the relatively small cost of professional service provides insurance against the potential damage that can result from well-intentioned but imperfect home maintenance.
Consider professional service if you've attempted to resolve noise issues without success, if you lack the proper tools for your specific bottom bracket type, or if your frame requires specialised procedures. Some press-fit frames, particularly those with problematic tolerances, benefit from professional installation with retaining compounds and bearing presses that most home mechanics don't possess. The investment in professional service often pays for itself in prevented frustration and reliable, creak-free operation.
The Sound of a Well-Maintained Bike
That glorious silence when you're pedalling smoothly along a quiet road, hearing nothing but tyres on tarmac and the gentle whir of your drivetrain—that's the sound of a well-maintained bottom bracket. Achieving and maintaining this state requires understanding the causes of bottom bracket noise, developing systematic diagnostic skills, and applying appropriate solutions when problems arise. Whether you're riding through the rolling hills of the Adelaide countryside, tackling the dusty trails of Central Australia, or simply commuting along Beach Road, your bottom bracket should be the last thing on your mind. With proper attention and occasional maintenance, it will remain invisible, silent, and reliable for thousands of kilometres of happy cycling.