Hidden beneath your stem and spacers lies one of the most overlooked yet critical components on your bicycle: the headset bearings. These unassuming rings of steel enable your handlebars to turn smoothly, your fork to track true, and your entire front end to function as a cohesive unit. Yet despite their importance, headset bearings often receive attention only when something goes wrong—a disconcerting wobble, a gritty feel through the bars, or that ominous creaking that echoes through carbon frames like a disgruntled ghost. For Australian cyclists battling everything from tropical downpours in Queensland to the corrosive salt air of coastal rides, understanding headset maintenance isn't just bike care trivia—it's essential knowledge for keeping your machine running smoothly through countless kilometres of varied conditions.
Understanding Your Headset: More Than Just Bearings
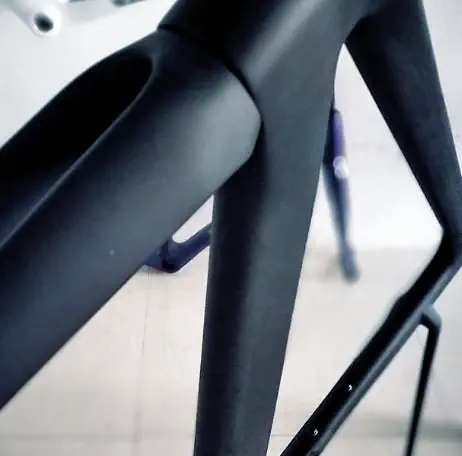
What Does a Headset Actually Do?
At its most fundamental level, your headset performs a seemingly simple task: it holds your fork in place while allowing it to rotate freely. Two bearings positioned at the top and bottom of your head tube create this interface, with your fork's steerer tube passing through them and clamped firmly by your stem. But within this apparently straightforward arrangement lies a remarkable engineering challenge. Your headset must simultaneously handle immense loads from braking forces, road vibrations, and steering inputs while maintaining smooth, precise rotation with zero play.
Think about the forces involved. When you grab a handful of front brake while descending at speed, your entire body weight shifts forward through your bars, through your stem, and directly into those headset bearings. Hit a pothole, and the impact transmits from your front wheel, through the fork, and again through those bearings. Yet despite this punishment, quality headset bearings should provide years of reliable service when properly maintained—something Australian riders will appreciate given our often challenging road conditions and the aggressive riding styles our terrain encourages.
Modern bicycles predominantly use two headset architectures, and understanding which type your bike employs is the first step towards proper maintenance. Press-fit headsets feature cups that are literally pressed into the head tube, with bearings sitting inside those cups. This system, designated as ZS (Zero Stack) when the cups sit inside the head tube, or EC (External Cup) when they protrude externally, has been the standard for decades and offers the advantage of replaceable cups if they become damaged.
Integrated headsets, marked as IS (Integrated System), take a different approach. The bearings sit directly on moulded races within the head tube itself—no cups required. This design saves weight and can look cleaner, but it also means the frame's integrated races must remain in good condition. If those races become pitted or damaged, the repair becomes significantly more complex and expensive. Many modern road and gravel bikes from Australian retailers now feature integrated headsets, making understanding their maintenance requirements particularly relevant for contemporary cyclists.
Reading the Alphabet Soup: SHIS Codes Decoded
If you've ever needed to replace headset bearings and found yourself confronted by codes like "ZS44/28.6 IS52/40," you've encountered the Standardized Headset Identification System. While this might look like technical gibberish, decoding these numbers is straightforward and invaluable for sourcing correct replacement parts.
The letters tell you the type: EC means External Cup, ZS indicates Zero Stack, and IS denotes Integrated System. The numbers that follow represent dimensions—the first number being the head tube diameter in millimetres, and the second (after the slash) indicating the steerer tube size. So ZS44/28.6 tells you a Zero Stack upper cup fitting a 44mm head tube and 28.6mm (1-1/8 inch) steerer, while IS52/40 indicates an Integrated lower bearing for a 52mm head tube with a 40mm crown race seat typical of tapered 1.5-inch steerers.
Understanding this system empowers you to source replacements confidently, whether shopping at your local Australian bike shop or ordering online from international suppliers. It also helps explain why your mate's headset bearings won't fit your bike despite both being "road bikes."
Diagnosing Headset Problems The Tell-Tale Signs: Play, Grinding, and Notchy Steering
Headset issues typically announce themselves through three primary symptoms, each indicating different stages of wear or maladjustment. Recognising these early can mean the difference between a simple bearing service and a complete headset replacement.
Play, or unwanted movement, represents the most common complaint. You'll feel it as a subtle knocking when applying the front brake while rocking the bike forward and backward. Place your fingers across the gap between the headset cover and head tube while performing this test—if you feel or see movement, your headset either needs adjustment or has worn bearings. A loose headset doesn't just feel disconcerting; it accelerates bearing wear and can eventually damage your frame's head tube.
Grinding or gritty steering suggests contamination has infiltrated your bearings. This occurs most commonly after wet rides, particularly those involving creek crossings, coastal salt spray, or the red dust that seems to coat everything during Australian summers. The grinding sensation means your bearing's lubricant has been compromised, allowing metal-on-metal contact that will rapidly accelerate wear if left unaddressed.
Notchy steering, where the bars seem to settle into specific positions rather than turning smoothly through the full arc, indicates the most serious condition: brinelling of the bearing races. This occurs when impacts or excessive loads create small indentations in the bearing surfaces, essentially creating "home positions" for the ball bearings. Unfortunately, once brinelling occurs, replacement is the only option.
The Simple Diagnostic Test You Can Do Right Now
Before heading out on your next ride, spend sixty seconds performing this basic headset check. Pull your front brake firmly and rock the bike forward and backward while placing your other hand over the headset cover. Any clicking or movement indicates play requiring attention. Next, lift the front wheel off the ground and turn the bars slowly from side to side. The steering should feel consistently smooth throughout the rotation—any grinding, notching, or resistance signals problems requiring investigation.
The Service Process: A Step-by-Step Guide
Tools You'll Need
Servicing a threadless headset—the type found on most modern bikes—requires minimal specialised equipment. You'll need a set of quality hex keys (4mm, 5mm, and 6mm typically), degreaser, a clean rag, waterproof grease, and ideally a torque wrench. For cartridge bearing replacement, you may also need a crown race puller if your fork uses a separate race, though many mechanics opt to have this service performed by their local bike shop due to the tool's limited versatility.
Disassembly: Getting to the Bearings
Begin by removing the front wheel—having the fork unsupported makes the entire process more manageable. Before loosening anything, photograph your current stem and spacer arrangement. This simple step can save considerable frustration during reassembly, ensuring you return your cockpit to its exact previous configuration.
Loosen the stem's steerer clamp bolts evenly, just enough to allow movement. Then remove the top cap bolt completely. Note that the top cap and bolt handle the crucial job of preload—compressing the system together before the stem clamps everything in place. With the top cap removed, slide the stem and any spacers off the steerer tube, keeping them in order.
Here's where planning ahead prevents headaches. Secure your handlebars to the top tube using a toe strap or similar, preventing them from dangling and straining brake hoses or cables. Similarly, use a strap between the fork crown and down tube to prevent the fork from dropping out unexpectedly and damaging the floor—or your carbon frame.
Remove the headset cover, noting any seals or compression rings beneath it. These components often differ between manufacturers, so careful observation during disassembly ensures correct reassembly. Finally, remove the upper bearing, noting its orientation—many bearings have specific directions of installation.
Lower Bearing Access: The Critical Step
The lower bearing bears the brunt of abuse, positioned directly in the firing line of road spray, trail debris, and whatever your front wheel kicks up. Consequently, it typically requires more frequent attention than its upper counterpart.
In ideal circumstances, the lower bearing slides off with the fork. More commonly, particularly on bikes ridden in harsh conditions, it remains stubbornly lodged in the head tube. If gentle persuasion with your fingers fails, work around the bearing's edge carefully with a flat-blade screwdriver, gradually working it free. Avoid prying hard on one side—this can damage both the bearing and its seat. Patience here prevents expensive repairs later.
With the bearing removed, inspect it thoroughly. Quality cartridge bearings should spin smoothly and silently; any grinding, roughness, or visible corrosion indicates replacement is necessary. When bearings become notchy or brinelled, no amount of cleaning will restore smooth operation.
Cleaning and Regreasing: The Heart of Maintenance
Whether reusing existing bearings or installing replacements, proper preparation of the bearing seats is essential. Clean the head tube's bearing surfaces thoroughly using degreaser and a clean rag. Any old grease, corrosion, or debris left behind will compromise the new installation.
Apply a generous layer of fresh waterproof grease to both the upper and lower bearing seats. In Australia's harsh conditions, where rides might involve creek crossings, coastal exposure, or extended periods between maintenance, a quality marine-grade grease provides additional protection against the elements. Don't be shy with the grease—excess can be wiped away, but insufficient lubrication leads directly to corrosion and premature wear.
If reusing bearings, clean them thoroughly and work fresh grease into the seals if possible. Quality bearings from manufacturers like Cane Creek, Chris King, or even quality OEM units often feature removable seals allowing full servicing. However, most standard cartridge bearings are designed as replacement items—when in doubt, new bearings are relatively inexpensive insurance.
Reassembly and Preload: Getting It Right
With fresh grease applied and bearings installed, carefully slide the fork back through the head tube. Replace the compression ring, bearing cover, spacers, and stem in their correct order. Before installing the top cap, verify that your spacers extend slightly above the steerer tube—approximately 3mm is ideal. Without this gap, the top cap cannot properly preload the bearings.
Install the top cap and begin tightening the preload bolt. Here's where many mechanics—both professional and home—get into trouble. The goal is to remove all play from the system while still allowing the bars to turn freely. Tighten the bolt until you feel resistance, then check for play by grabbing the front brake and rocking the bike. Continue tightening in small increments until play disappears, then verify the bars still turn smoothly. If the steering feels stiff or notchy after removing play, you've over-tightened—back off slightly and try again.
Once satisfied with the adjustment, align your stem with the front wheel. Straddling the top tube often helps achieve perfect alignment. Finally, torque the stem's steerer clamp bolts to the manufacturer's specification, typically between 5 and 8Nm for most stems. With the stem clamped, the preload bolt's job is complete—it doesn't need to remain tight.
Tailoring Maintenance to Our Conditions
Battling the Elements
Brisbane cyclists face a unique combination of challenges that accelerate headset wear. The tropical north's wet season brings monsoonal downpours that can overwhelm any seal design. The southern states' winter riding often involves constant moisture and road grit. Coastal rides expose bikes to salt spray that can begin corroding components within hours. Even the seemingly benign Australian sun takes its toll, drying out grease and degrading rubber seals.
For riders regularly facing these conditions, consider reducing service intervals. A headset that might only need attention annually in temperate climates could require six-monthly or even quarterly service when regularly exposed to water, salt, or dust. The investment of thirty minutes every few months pays dividends in extended bearing life and consistently smooth steering.
Choosing the Right Grease
Not all greases perform equally in harsh conditions. Standard lithium-based greases work adequately for fair-weather riding, but Australian conditions often demand more robust options. Marine greases, formulated to resist water washout and salt corrosion, provide superior protection for coastal riders. For those regularly encountering extreme conditions, greases containing molybdenum disulfide offer enhanced protection under high loads.
Whatever grease you choose, apply it generously. More grease means better protection against water ingress and contamination. The small amount that squeezes out during assembly can be wiped away, leaving a complete seal protecting your bearings.
Your headset bearings might be hidden from view, but their smooth operation is fundamental to your bike's handling and your confidence on the road or trail. Understanding the signs of wear, knowing how to perform basic service, and recognising when professional help is needed empowers you to maintain this critical system properly. For Australian cyclists facing challenging conditions across our diverse climate zones, proactive headset maintenance isn't just good practice—it's essential for reliable performance and extended component life. Next time you're cleaning your bike after a dusty outback adventure or a soggy coastal ride, spare a thought for those humble bearings, and consider whether they might appreciate a little attention before your next big outing.